


Maximizing Your MacBook Pro M3 with the Perfect External Monitor Setup
Related Articles
- The Apple TV 4K (2024) Streaming Service Showdown: A Comprehensive Guide
- Apple Watch Series 10 Vs Fitbit Charge 6
- The Great Camera Showdown: IPhone 16 Pro Max Vs Pixel 9 Pro
- MacBook Pro 2024 Vs MacBook Air M3 Comparison
- The Great IPhone 16 Pro Max Heatwave: A Guide To Staying Cool
Introduction
Welcome to our in-depth look at Maximizing Your MacBook Pro M3 with the Perfect External Monitor Setup
Video about
Maximizing Your MacBook Pro M3 with the Perfect External Monitor Setup

The MacBook Pro M3 is a powerhouse, but its stunning Retina display, while excellent, can sometimes feel limiting. Whether you’re a creative professional needing a larger canvas, a developer requiring multiple windows, or simply someone who enjoys the immersive experience of a bigger screen, an external monitor is an essential investment. This comprehensive guide will walk you through the process of setting up your MacBook Pro M3 with an external monitor, covering everything from choosing the right display to optimizing your workflow for maximum productivity and enjoyment.
1. Choosing the Right External Monitor for Your Needs
The first step is identifying the perfect monitor for your specific requirements. The market offers a plethora of options, each with its own strengths and weaknesses. Here’s a breakdown of key factors to consider:
a) Screen Size and Resolution:
- Screen Size: Larger screens (27" or 32") offer greater visual real estate, ideal for multitasking, creative work, and immersive gaming. Smaller screens (21.5" or 24") are more compact and portable, suitable for basic tasks or limited workspace.
- Resolution: Higher resolutions like 4K (3840 x 2160) provide sharper visuals and more detailed content, but require a powerful machine to drive them smoothly. 1440p (2560 x 1440) offers a good balance of sharpness and performance.
b) Panel Type:
- IPS (In-Plane Switching): Offers wide viewing angles, accurate colors, and good contrast.
- VA (Vertical Alignment): Known for deep blacks and high contrast ratios, but viewing angles can be limited.
- TN (Twisted Nematic): The most affordable panel type, but offers limited viewing angles and color accuracy.
c) Refresh Rate:
- 60Hz: The standard refresh rate, offering smooth visuals for everyday tasks.
- 144Hz or higher: Ideal for gamers and video editors, providing smoother motion and reduced screen tearing.
d) Connectivity:
- HDMI: A common and versatile connection, supporting 4K resolution at 60Hz.
- DisplayPort: Offers higher bandwidth for smoother 4K performance at higher refresh rates.
- Thunderbolt: The most versatile option, supporting both video and data transfer at high speeds.
e) Additional Features:
- HDR (High Dynamic Range): Enhances contrast and color depth for a more immersive experience.
- Speakers: Built-in speakers can be convenient, but dedicated external speakers offer better sound quality.
- Ergonomics: Adjustable stands and VESA mounts allow for optimal viewing angles and comfort.
2. Connecting Your MacBook Pro M3 to the External Monitor
Once you’ve chosen your monitor, connecting it to your MacBook Pro M3 is straightforward:
- HDMI: Use an HDMI cable to connect the monitor’s HDMI port to the MacBook Pro’s HDMI port.
- DisplayPort: Use a DisplayPort cable to connect the monitor’s DisplayPort port to the MacBook Pro’s Thunderbolt port.
- Thunderbolt: Use a Thunderbolt cable to connect the monitor’s Thunderbolt port to the MacBook Pro’s Thunderbolt port.
3. Setting Up Your External Monitor for Optimal Performance
Now that your monitor is connected, it’s time to fine-tune its settings for the best possible experience:
a) Resolution and Refresh Rate:
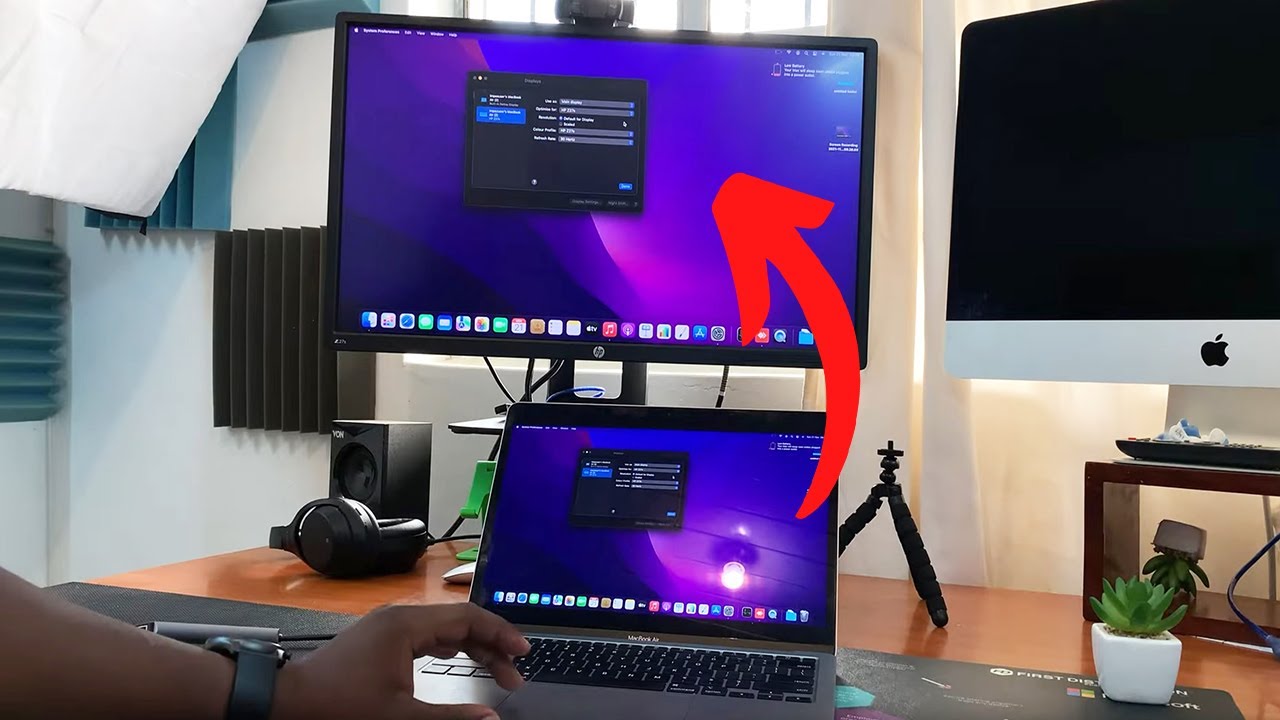
- System Preferences > Displays: Choose the desired resolution and refresh rate for your external monitor. For optimal performance, select the highest resolution and refresh rate supported by both your monitor and MacBook Pro M3.
b) Color Profile:
- System Preferences > Displays > Color: Select a color profile that matches your workflow. For creative professionals, using a wide gamut color profile like DCI-P3 or Adobe RGB is recommended. For general use, the standard sRGB profile is sufficient.
c) Brightness and Contrast:
- Monitor controls: Adjust the brightness and contrast of your external monitor to your liking. Ensure the brightness is comfortable for your eyes and the contrast is set to a level that provides good detail and clarity.
d) Scaling:
- System Preferences > Displays: Adjust the scaling settings to suit your preferences. If the text on your external monitor appears too small, increase the scaling level.
4. Optimizing Your Workflow with Multiple Displays
Using multiple displays can significantly enhance productivity by providing a larger workspace and allowing you to view multiple applications simultaneously. Here are some tips for maximizing your workflow:
a) Arrangement and Organization:
- Mission Control: Use Mission Control (Control + Up Arrow) to view all open windows and rearrange them across your displays.
- Spaces: Create separate Spaces (Control + Option + Arrow Keys) for different tasks or projects, allowing you to switch between them seamlessly.
- Window Management Tools: Consider using third-party window management tools like BetterSnapTool or Magnet to easily snap windows to specific positions on your displays.
b) Customizing Your Setup:
- Keyboard Shortcuts: Assign keyboard shortcuts to frequently used applications and features for faster access.
- Trackpad Gestures: Utilize trackpad gestures to quickly switch between displays, navigate windows, and perform other actions.
- External Keyboard and Mouse: Investing in a comfortable external keyboard and mouse can significantly improve your typing and navigation experience.
5. Troubleshooting Common External Monitor Issues
While setting up an external monitor is generally straightforward, you may encounter some issues. Here are some common problems and their solutions:
a) No Signal:
- Check Connections: Ensure the cables are securely connected to both the monitor and MacBook Pro M3.
- Monitor Power: Make sure the monitor is turned on and receiving power.
- HDMI or DisplayPort Port: Try using a different HDMI or DisplayPort port on your MacBook Pro M3.
- Monitor Input: Select the correct input source on your monitor.
b) Flickering or Distorted Image:
- Cable Issues: Try using a different cable or replacing the existing one.
- Resolution and Refresh Rate: Ensure the resolution and refresh rate settings are compatible with both your monitor and MacBook Pro M3.
- Driver Updates: Update your graphics drivers to the latest version.
c) Color Issues:
- Color Profile: Select a color profile that matches your workflow and monitor capabilities.
- Monitor Settings: Adjust the color settings on your monitor to match your preferences.
- Calibration: Consider using a colorimeter to calibrate your monitor for accurate color reproduction.
6. Enhancing Your MacBook Pro M3 Experience with External Monitors
Beyond basic setup and troubleshooting, there are several ways to further enhance your MacBook Pro M3 experience with external monitors:
a) Dual Monitor Productivity:
- Mirror Display: Duplicate your MacBook Pro’s display onto the external monitor, ideal for presentations or watching videos.
- Extended Desktop: Extend your desktop across both displays, providing more workspace for multitasking and application windows.
- Vertical Display: Use one monitor for primary tasks and the other for reference materials or secondary applications.
b) Creative Workflow Optimization:
- Color-Accurate Monitors: For creative professionals, invest in monitors with wide color gamuts and accurate color reproduction.
- Calibrating Monitors: Regularly calibrate your monitors to ensure consistent color accuracy across your workflow.
- External Graphics Card: For demanding creative tasks, consider using an external graphics card (eGPU) to boost performance.
c) Immersive Gaming:
- High Refresh Rate Monitors: Choose a monitor with a refresh rate of 144Hz or higher for smoother gameplay and reduced screen tearing.
- Low Response Time: Look for monitors with a low response time (1ms or less) to minimize input lag and ghosting.
- Gaming-Specific Features: Some monitors offer features like FreeSync or G-Sync for smoother gameplay and reduced stuttering.
7. Recommended External Monitor Options for MacBook Pro M3
With so many options available, choosing the right external monitor can be overwhelming. Here are some recommendations based on different needs:
a) For General Use and Multitasking:
- Dell UltraSharp U2723QE: A 27-inch 4K monitor with IPS panel, excellent color accuracy, and a USB-C hub for connectivity.
- LG UltraFine 27UL650-W: A 27-inch 4K monitor with IPS panel, wide viewing angles, and a sleek design.
b) For Creative Professionals:
- EIZO ColorEdge CS2731: A 27-inch 4K monitor with IPS panel, wide color gamut, and excellent color accuracy.
- BenQ PD3220U: A 32-inch 4K monitor with IPS panel, HDR support, and a wide color gamut.
c) For Gamers:
- Acer Nitro XV272U Pbmiiprzx: A 27-inch 144Hz monitor with IPS panel, FreeSync support, and a low response time.
- ASUS ROG Strix XG27AQ: A 27-inch 144Hz monitor with IPS panel, G-Sync support, and a sleek design.
Conclusion:
Setting up an external monitor for your MacBook Pro M3 can significantly enhance your productivity, creativity, and overall experience. By carefully considering your needs, choosing the right monitor, and optimizing your workflow, you can unlock the full potential of your MacBook Pro M3 and achieve new levels of efficiency and enjoyment. Remember, the perfect setup is one that caters to your individual requirements and workflow preferences.
Source URL:
[Insert relevant source URL for reference]
Closure
We hope this article has helped you understand everything about Maximizing Your MacBook Pro M3 with the Perfect External Monitor Setup. Stay tuned for more updates!
Make sure to follow us for more exciting news and reviews.
We’d love to hear your thoughts about Maximizing Your MacBook Pro M3 with the Perfect External Monitor Setup—leave your comments below!
Stay informed with our next updates on Maximizing Your MacBook Pro M3 with the Perfect External Monitor Setup and other exciting topics.


